The Integrations Client Tokens option authenticates your Loginless Desktop applications instance. Once configured this feature will allow the Lens Desktop user to access the app without having to login or accepting the EULA.
To Create a Client Token
- Go to the ACCOUNT menu > Manage Accounts.
- Select an Account from the list.
- Select Integrations > Client Tokens from the side tabs.
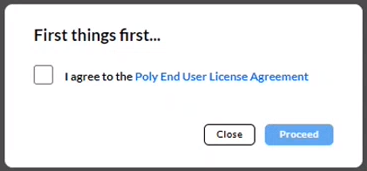
- Select I agree to the Poly End User License Agreement and select Confirm.
This is required before you can start using Client Tokens. Select the link to review the Agreement. - Select Create Client Token, if this is your first Client Token.
Select Add New to add additional Tokens. - Enter a Client Token Name and select Create.
- The Client Token will display on a table with the date created, and the token, ready to be used to create a Loginless configuration.
Loginless Configuration with Poly Lens Desktop App
Poly Lens will provide a token that the customer will use when installing the Lens Desktop application. The application installer will take this token on the command line using a command line switch.
- Go to the ACCOUNT menu > Manage Accounts.
- Select an Account from the list.
- Select Integrations > Client Tokens from the side tabs.
- Locate the Client Token to apply from the list.
- Wand over the Eye icon and select the Copy to clipboard icon.
- This parameter can be inserted in the MSI installer for the Poly Lens Desktop app installation.
a. Open a command Prompt.
b. Paste the copied Client Token at the following:
  C:\Windows\system32>cd C:\LENS_DESKTOP\lensdesktop\release
  C:\LENS_DESKTOP\lensdesktop\release>msiexec /i PolyLens.msi /l*v log.log TENANTTOKEN= **Paste Token Here** <br />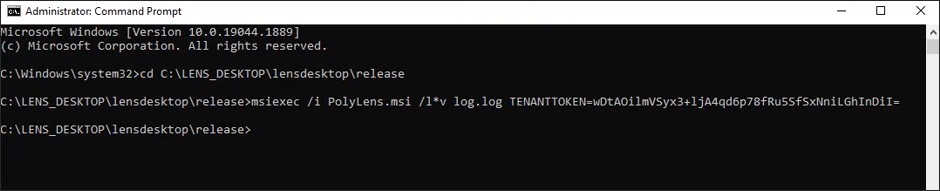
- Once the Loginless installation has been configured, this parameter will be stored in the Windows registry. The Poly Lens Desktop application will use this token on startup and will login the user to the correct Account.
Poly Lens Desktop Super User and Machine Wide Installations
By defaul the Poly Lens Desktop App will only install under a User profile. To enable a Machine Wide Installaton, see the following:
  msiexec /i "<poly_lens_client_msi>" /l*v log.log /q ALLUSERS=1 TENANTTOKEN=<tenant_token> Loggin enabled<br />

  msiexec /i "<poly_lens_client_msi>" /q ALLUSERS=1 TENANTTOKEN=<tenant_token>
Note: For more information about the ALLUSERS parameter, please see Microsoft Documentation.
Turn Off the Auto Accept EULA Feature
To turn off the automatic EULA approval feature, the IT manager can add an additional parameter to the MSI installer command line for the Poly Lens Desktop app installation.
When entering the command below, add an additional parameter ACCEPTEULA=1

This will tell the application to start with the Accept the EULA page before opening the app.
Disable or Enable Lens Desktop from Sending Telemetry and User Information
The following flags give admin control to enable and disable sending of Telemetry and User Information to the cloud.
- The following flags can be added to the msiexec /i PolyLens.msi NOUSERINFO=1 command:
NOUSERINFO
= 0 send event on cloud = 1 stop sending info about user on cloud no parameter in installation command -> work as it is now

- Once complete the flag will be applied and the Account Lens Desktop Details page and the Lens Desktop devices page will reflect this change.
The New Lens Desktop Experience
Once the Loginless feature is configured, the Lens Desktop app will open in a minimized mode (no login or EULA approval) and opens directly to the Home page. The Account that the Client Token was created in, will be the Account the user will be associated with.
Note: The current settings on Loginless can be verified on the Lens Desktop UI > Settings > General > EULA.